Dynamic Blocks
Data Source
When building a Dynamic Block, Engage+ supports two different data sources:
- A table in the Messaging database
- The Engagement Data Platform (EDP) (note that EDP is available for existing customers only)
The Dynamic Block creation steps and features vary between the two data sources. This document focuses only on using a Messaging table as the Dynamic Block data source. For more information on Dynamic Blocks that use EDP as the data source, please see the Marigold Engage+ Online Help.
Dynamic Content
A Dynamic Block allows you to customize the content of a Campaign based on a logical rule or condition. Instead of having to create separate Campaigns for each content variation, you can create a single Campaign, and use a Dynamic Block to determine the appropriate content to send to each recipient.
Typically, you create your content variations as a series of Content Blocks. Then, using a Dynamic Block, you can define the rules or conditions that determine which Content Block gets sent to which recipient. This structure is called a Rule / Block Pair as it consists of both a condition (the "Rule") and a resulting action (the "Block" to be used). A single Dynamic Block can consist of one to many different Rule / Block Pairs to drive specific, personalized content to the correct audience.
Note: This document assumes that you've already built all of the necessary Content Blocks that represent the different dynamic content variations. For more details on Content Blocks, please see the Marigold Engage+ Online Help.
Create a dynamic block
1. In the Top Navigation bar, select Assets > Blocks > Dynamic Blocks.
2. On the Tool Ribbon, click New Dynamic Block.
3. Fill out the Dynamic block details:
- What?: Enter Dynamic Block name.
- Where?: Select the folder where you want to save the Dynamic Block.
- Name: Enter a unique descriptive name for the Dynamic Block.
- Source: Ensure Engage+ is selected.
- Data Source: Select the source table for the Dynamic Block.
4. Click Create. A blank Dynamic Block screen is displayed.
Define the default content
Dynamic Blocks support the use of default content, which will be sent to Campaign recipients who don't meet any of the defined rules. The use of default content is optional, but usually recommended.
To define the default content:
1. Click the edit button (pen icon) within the Default row.
![]()
2. The Content Block radio button is selected by default. The Content Editor is displayed.
Hint: You can optionally use External Content Blocks instead of Content Blocks to define the dynamic content variations. This document focuses on the use of Content Blocks.
3. Select an option:
- To create a new Content Block, enter its name in the Content Block field. Then enter the desired content into the Content Editor.
- To select an existing Content Block, click the magnifying glass icon to browse for and select it. The Content Editor screen is populated with this Content Block. You can optionally make changes to this Content Block from this screen.
4. In the Tool Ribbon, click Save Rule / Block to save the Default content, and return to the Dynamic Block details screen. The name of the Content Block appears within the Default row.
Hint: If you don't want Default content in your Dynamic Block, then simply don't define or select a Content Block for it. You can't delete the Default row from the screen.
Select the conditional statement
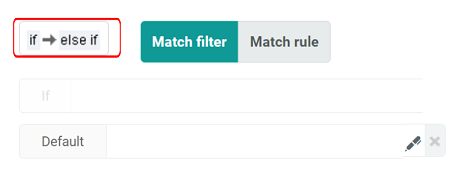
Engage+ supports two "conditional statements" that define the business logic for the Rule / Block Pairs: IF > ELSE IF and IF > IF.
The IF > ELSE IF conditional statement is useful if you know you want a recipient to fall into only one Rule / Block Pair, and therefore to receive only one Content Block. The platform works from the top down, evaluating recipients against the first rule. Only the non-matching recipients drop down to the subsequent rules. Once a recipient matches a Rule / Block Pair, they are removed from any further evaluations.
The IF > IF conditional statement allows a recipient to potentially match to multiple rules, and therefore to receive multiple Content Blocks. The platform evaluates every recipient against every rule.
To select the conditional statement for the Dynamic Block:
1. By default, a Dynamic Block uses the IF > ELSE IF conditional statement. Click the conditional statement toggle to switch to IF > IF.
Query Types
Engage+ provides two different methods (called "query types") for establishing how you want to identify which recipients get which content variant:
- By Filter: Define multiple Filters that will break the Campaign audience into smaller unique groups, each of whom should receive unique content.
- By Field: Look for a specific value in a database field in order to determine your Rule / Block Pair. A Dynamic Block is limited to using only one field, and that field must be contained on the Dynamic Block's source table (you can't join to another table).
You must choose only one query type for your Dynamic Block; you can't use both types within the same Dynamic Block. If you have existing Rule / Block Pairs, and then you attempt to toggle to the other query type, the platform displays a confirmation dialog box, warning you that all of the rules defined for your existing Rule / Block Pairs will be cleared, and you'll need to redefine them using the new query type method.
Query type: By filter
To use Filters as the query type in a Dynamic Block:
1. Select the Match Filter toggle button.
2. In the Add New section of the Tool Ribbon, place check marks next to the format versions that you want to include in this Rule / Block Pair.
Note: By default, HTML and Text format versions are selected.
3. In the Tool Ribbon, click Add New Rule / Block.
4. The Rule Filter field is used to define or select the Filter used for this Rule / Block Pair.
- To use an existing Filter, click the browse button (magnifying glass icon) to browse for and select it.
- To create a new Filter, click the new button (plus-sign icon).
5. Select the Content Block radio button. The Content Editor is displayed. The Content Editor includes tabs for each of the format versions that you checked above in step 2.
6. Select an option:
- To create a new Content Block, enter its name in the Content Block field. Click the tab for the desired format version, then enter the desired content into the Content Editor.
- To select an existing Content Block, click the browse button (magnifying glass icon) to browse for and select it. The Content Editor screen is populated with this Content Block. You can optionally make changes to this Content Block from this screen.
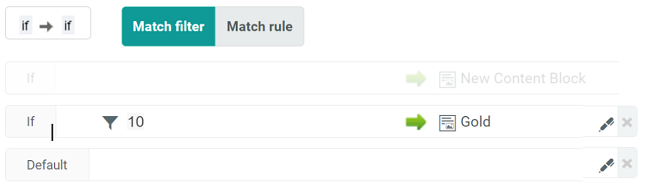
7. In the Tool Ribbon, click Save Rule / Block to save the Rule / Block Pair, and return to the Dynamic Block details screen. A new row is displayed on the screen, showing the selected Filter and Content Block.

8. Repeat the above steps as needed.
9. In the Tool Ribbon, click Save.
Query type: By field
To use a value in a field as the query type in a Dynamic Block:
1. Select the Match Rule toggle button.
2. From the Match Rule drop-down menu, select the desired field on the Dynamic Block source table.
3. In the Add New section of the Tool Ribbon, place check marks next to the format versions that you want to include in this Rule / Block Pair.
Hint: By default, HTML and Text format versions are selected.
4. In the Tool Ribbon, click Add New Rule / Block.
5. If the field you selected above is a restricted field, then the drop-down menu for the Rule / Block Pair is populated with all of the valid values for this field; select the desired value from this menu. If this field is not restricted, then enter the desired value in the text field.
6. Select the Content Block radio button. The Content Editor is displayed. The Content Editor includes tabs for each of the version formats that you checked above in step 3.
7. Select an option:
- To create a new Content Block, enter its name in the Content Block field. Click the tab for the desired format version, then enter the desired content into the Content Editor.
- To select an existing Content Block, click the browse button (magnifying glass icon) to browse for and select it. The Content Editor screen is populated with this Content Block. You can optionally make changes to this Content Block from this screen.
8. In the Tool Ribbon, click Save Rule / Block to save the Rule / Block Pair, and return to the Dynamic Block details screen. A new row is displayed on the screen, showing the selected field value and Content Block.
9. Repeat the above steps as needed.
10. In the Tool Ribbon, click Save.
Working with Rule / Block Pairs
This section describes how to manage the Rule / Block Pairs in your Dynamic Block.
Edit a rule / block pair
To edit an existing Rule / Block Pair:
1. Next to the desired Rule / Block Pair, click the edit button (pen icon). The Rule / Block screen is displayed.
2. Make any necessary changes to the Rule / Block definition.
3. In the Tool Ribbon, click Save Rule / Block to save the Rule / Block Pair, and return to the Dynamic Block details screen.
4. In the Tool Ribbon, click Save.
Rearrange rule / block pairs
If you're using the IF > ELSE IF conditional statement, the sequence of Rule / Block Pairs is important, as the platform will evaluate recipients against the rules in order, from top to bottom.
To rearrange the sequence of Rule / Block Pairs:
1. Click on the section to the left of the desired row, and drag the entire row to its new location.

Note: You can't move the default row.
Delete a rule / block pair
To delete a Rule / Block Pair:
1. Next to the desired Rule / Block Pair, click the remove button ("X" icon). The Rule / Block Pair is grayed-out to indicate that it's been marked for deletion.
2. To complete the removal, click Save in the Tool Ribbon.
Tip: Before clicking Save, you can click the restore icon to cancel the deletion.
Import rule / block pairs
Instead of defining Rule / Block Pairs through the Engage+ user interface, you can optionally import a spreadsheet that contains the details of the Rule / Block Pairs. When uploading a spreadsheet, the following restrictions apply:
- The upload feature is available only when you've selected Match Filter as the query type. The feature is not available for the Match Rule query type.
- When you upload a file, any existing Rule / Block Pairs in the Dynamic Block are overwritten, and are replaced by the Rule / Block Pairs contained in the import file.
- The import file must be a text file (.txt), a comma-separated values file (.csv), or a Microsoft Excel file (.xls / .xlsx).
To import Rule / Block Pairs:
1. Select the Match Filter toggle.
2. In the Tool Ribbon, click Upload File. The Import from Spreadsheet pop-up window is displayed.
3. Click Choose File. Browse to and select your upload file.
4. The platform parses the uploaded file and populates the Dynamic Block with the Rule / Block Pairs contained within the file.
Note: For more details on the structure and content of the import file, please see the Marigold Engage+ Online Help.
